
Aiming is most of the job. An outdoor fixture in roughly the right place, pointed carefully, will beat an expensive one dropped in the bed and left pointing wherever it landed. The choices that matter are how far back the fixture sits, how steep the angle is, and what the beam does after it passes the thing you meant to light.
TL;DR
Outdoor aiming comes down to four techniques that do different jobs. Uplighting sets the fixture back from a tree and throws light up into the canopy. Grazing puts it close to a wall and skims the beam along the surface to bring out texture. Washing sits further back and lays flat, even light across a facade. Silhouetting puts the light behind the subject and aims at the wall behind it, turning the shape into a black outline.
Whatever the technique, the beam has to stop somewhere: the National Park Service names the failure modes as glare, light trespass, and skyglow. Never fasten a fixture to a tree trunk. Wounds in bark admit decay organisms that go on to digest the tissue the tree moves water through.
The Four Techniques, and What Each One Is Actually For
Most outdoor lighting problems are a technique problem rather than a fixture problem. These four cover nearly everything a house needs.
| Technique | Where the fixture goes | What it produces |
| Uplighting | set back from the base, aimed up into the subject | depth and height, best on trees and columns |
| Grazing | tight to the surface, beam skimming almost parallel | texture, shadow in every joint and irregularity |
| Washing | further back, aimed flatter at the surface | even brightness across a facade, texture flattened |
| Silhouetting | behind the subject, aimed at the surface beyond | a dark shape against a lit background |
Grazing and washing get confused constantly, and they are close to opposites.
Two feet decides which one you get. Move a fixture two feet further from a brick wall and the raking shadows that made the masonry interesting collapse into flat light. Move it two feet closer and a smooth stucco wall that looked fine turns into a map of every trowel mark the plasterer left behind.
That is the test to run before buying anything. Look at the surface in raking daylight, early morning or late afternoon, when the sun is doing roughly what a grazing fixture would do. If it looks good, then graze it. If it looks blotchy, wash it instead.
What Columbus housing stock rewards
Brick is the local advantage. Older Columbus neighbourhoods are full of it, from German Village through Victorian Village and up Indianola into Clintonville, and brick is the surface grazing was invented for. Every mortar joint casts its own small shadow, and the wall reads as three-dimensional after dark.
Newer vinyl and smooth-finish siding does the opposite. There is nothing on the surface for a raking beam to catch, so the same fixture in the same position produces a bright vertical stripe and a lot of glare for anyone walking past. Those houses want washing from further back, or nothing on the walls at all, with the attention put on planting instead.
Limestone and cast stone sit in between and are worth a trial before committing. We can lend you the sense of it from a lit display, though a test in place at night is better than any showroom.
How Far Back, and How Steep
Distance and angle trade against each other, and the subject decides both. Getting them wrong is what produces the two most recognisable mistakes: a hot bright patch at the bottom of a tree with a dark canopy above it, and a fixture that lights the house beautifully and blinds everyone in the driveway.
For a tree, the fixture goes far enough out that the beam covers the canopy rather than the trunk. Close in, you light bark. Set back, the light travels up through the branches and the whole shape reads. Two fixtures at different distances, one closer for the trunk and one further out for the crown, do more than one fixture of any size.
For a wall you want grazed, the fixture goes close, often within a foot, aimed nearly straight up the face. For a wall you want washed, it comes back several feet and flattens out. Our outdoor directional lights have adjustable knuckles precisely because the number you want is never the number you guessed, and the aim changes again once the planting fills in.
Beam angle does the rest of the work, and the wider it is, the further the light spreads before it does anything useful. There is a fuller explanation of beam spread and how the cone widens with distance in our guide to what directional lighting is for.
Never Bolt a Fixture to a Tree
Do not do it.
Tree-mounted downlights are fashionable, and the usual mounting methods are damaging, so this one is worth being blunt about.
The Ohio State University Extension factsheet Tree Wounds and Decay sets out what happens when bark is broken: newly uncovered tissue is exposed to canker pathogens and decay microorganisms, and those organisms go on to digest the phloem and xylem that move water and nutrients through the tree, along with the heartwood that holds it up. Trees respond by forming callus tissue over the wound, which is why anything that keeps reopening the injury is worse than a single clean cut.
A lag bolt driven into a trunk is one wound. A strap cinched around it is a slower problem, because the trunk keeps growing into the strap and the injury never closes. Neither is a good trade for a lighting effect.
Mount to the house, to a post, or to a stake in the ground and aim back at the tree. If a downlight from inside the canopy is the effect you want, that is a conversation for an arborist rather than a lighting decision, and it should be their call rather than ours.
There is a second, quieter version of the same mistake that shows up around the base of the trunk. In-ground fixtures get set tight against a tree because that is where the aim looked best on the night of the install, and then the mower, the trimmer, and the annual mulching all start working around a metal object sitting in the root flare. The same OSU factsheet is worth reading on this point, because mechanical wounds at the base are among the most common ways a healthy tree picks up decay, and a fixture housing is a permanent obstacle in exactly the wrong place.
Set ground fixtures out beyond the mulch ring where the mower is not going anyway. The aim barely changes, and the tree stops paying for the lighting scheme.
Roots are the other thing worth respecting. Trenching a cable run straight through a root plate to reach a fixture on the far side of a mature tree does real damage that will not show for several seasons, and by the time it does, nobody connects it to the lighting. Route cable around the drip line rather than across it, and if the tree is a mature specimen, get an arborist to say where the trench can go before anything is cut.
Glare, Trespass and Being a Good Neighbour
The National Park Service names three ways outdoor lighting goes wrong, and all three are aiming faults rather than fixture faults. Glare is bright light shining directly at an observer in a way that interferes with vision. Light trespass is the unintended spill of light into someone else’s property or space. Skyglow is the brightening of the night sky by light scattered in the atmosphere.
Each has a fix that costs nothing, and none of them involves buying anything. Glare goes away when the source is hidden from the angles people actually stand at, which usually means moving the fixture rather than dimming it. Trespass goes away when you stand in the neighbour’s driveway and look back at your own house, which is the single most useful ten minutes in any lighting install. Skyglow goes away when the light lands on something instead of sailing past it.
Shields, louvres and glare guards exist for the cases where the geometry cannot be fixed by moving the fixture, and they are worth asking about rather than accepting a compromise.
The mistake that only appears in autumn
Early September is the moment to re-check anything aimed upward, because the aim you set in summer is about to change on its own.
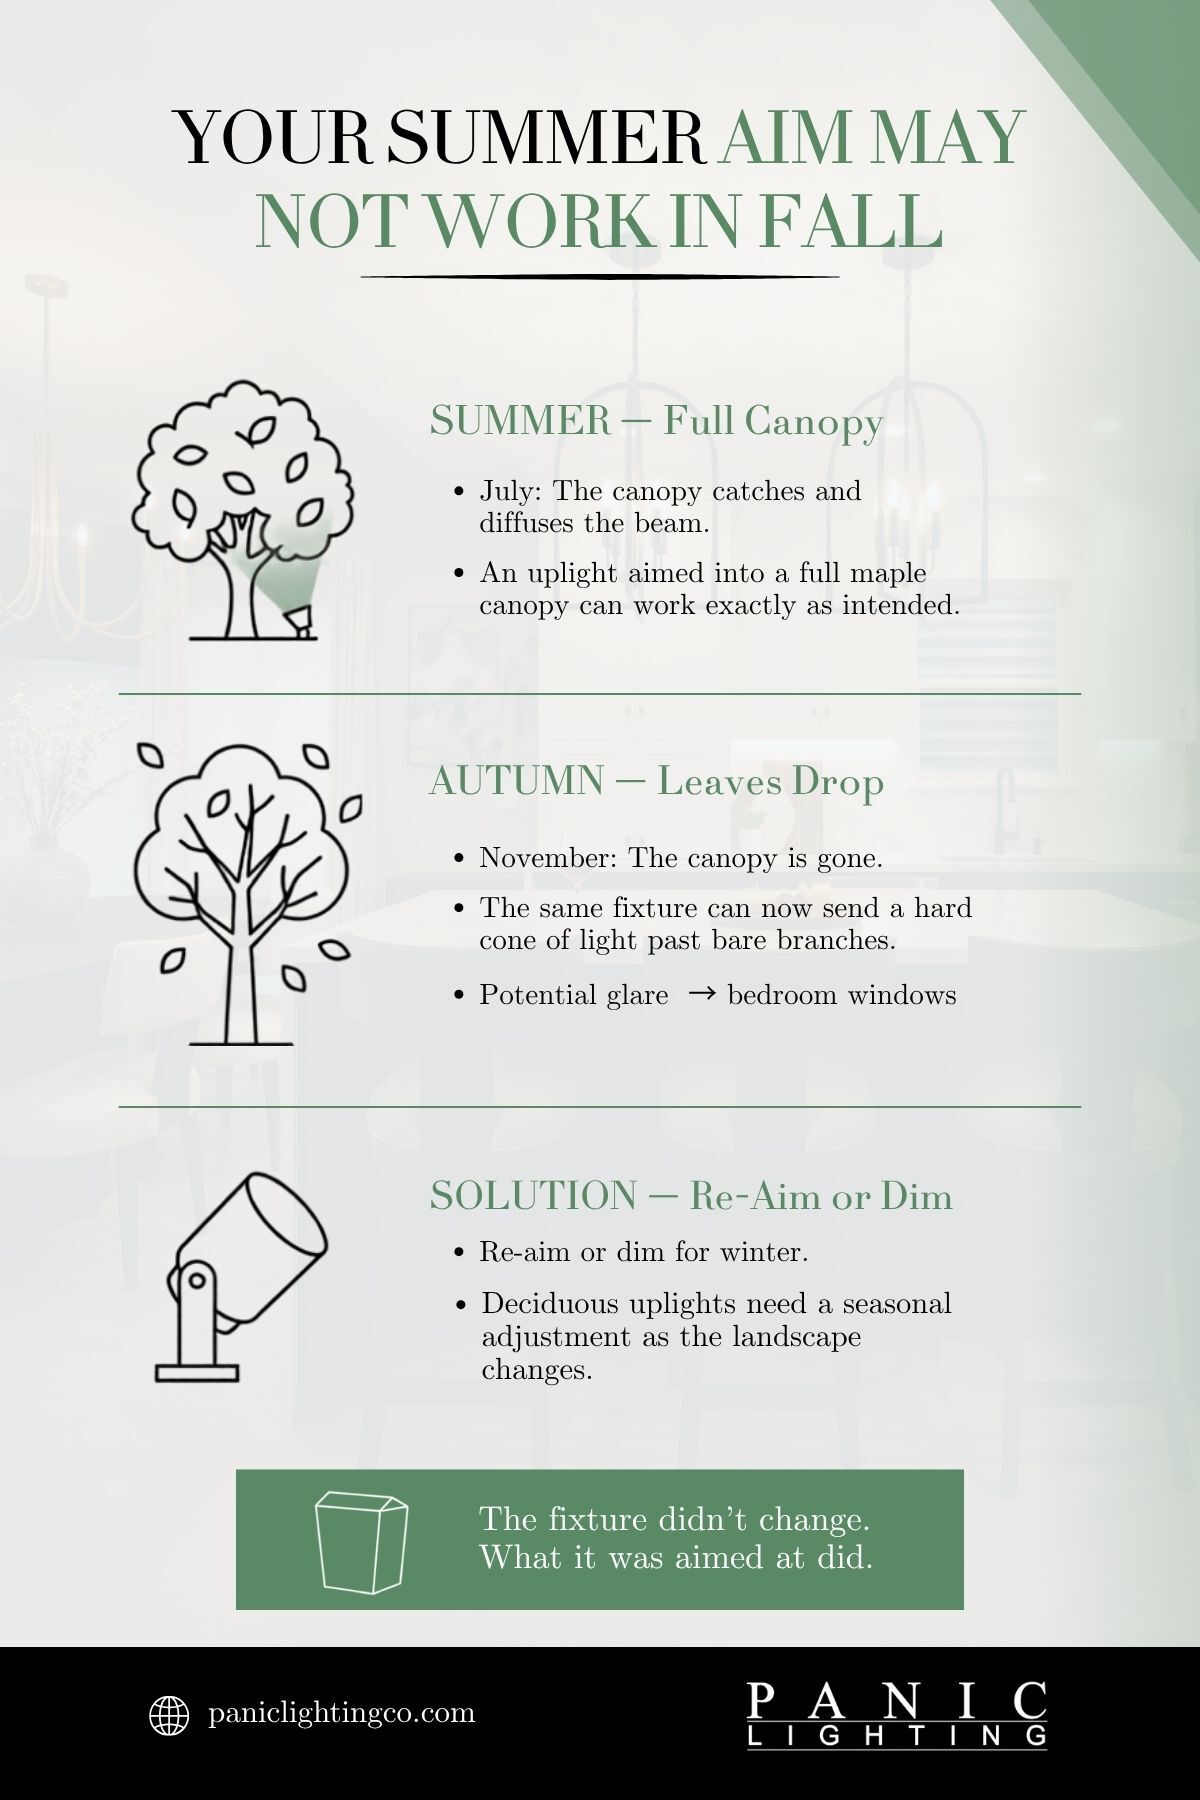
An uplight pointed into a full maple canopy in July is doing exactly what you wanted. By early November the leaves are down, the canopy that was catching and diffusing the beam is gone, and the same fixture is now firing a hard cone of light past bare branches and straight into whatever is behind the tree. Frequently that is a bedroom window on the next lot.
Nothing about the fixture changed.
The thing it was aimed at left. Deciduous uplights get a seasonal re-aim, or a dimmer setting for winter, and that is the difference between a lit garden and a complaint.
Hide the Fixture, Not the Effect
A fixture you can see from the sidewalk is usually a fixture in the wrong place.
Outdoor lighting reads best when the source is invisible and only the result shows. That is partly about glare and partly about the illusion: a lit tree looks like moonlight until you spot the fitting that made it, at which point it looks like equipment. Planting, a low wall, a change in grade, or the tree’s own trunk will all hide a fixture if you place it with concealment in mind rather than as an afterthought.
Two techniques worth adding to the four in the table above, both of which depend on concealment.
Moonlighting puts a fixture high in a tree or under an eave and aims it down through the branches, so the light falls in dappled patches on the ground. It is the most convincing outdoor effect there is and the hardest to install, because the fixture has to be high and hidden. It is also the effect people most often try to achieve by strapping a light to a trunk, which is the one method to avoid.
Shadowing is silhouetting turned around. Put the fixture in front of the subject and let the shadow fall on the wall behind it, so the shape appears twice, once solid and once as a projection. Ferns and ornamental grasses in front of a pale wall do this beautifully, and it costs one fixture.
Neither works if the hardware is in plain sight. Walk the property from the street, from the front door and from the driveway before you fix anything down, and move whatever you can see.
Wet Rated, Damp Rated and Ohio Winters
Outdoor fixtures carry a listing that tells you where they can go, and the label is the only reliable guide. Damp rated suits a covered porch or a soffit, somewhere sheltered from direct rain. Wet-rated is what anything exposed needs, including every in-ground uplight and anything on an open wall.
Ohio adds a second problem beyond rain. Ground-mounted fixtures sit in soil that freezes and thaws repeatedly through the winter, and stakes pushed into soft autumn ground work themselves loose and out of aim by March. Setting them properly at install and expecting to re-seat some of them in spring is the realistic version. Anything on a covered patio has an easier life and a wider choice of fixtures.
Winter changes the arithmetic.
Snow is worth planning for too. A fresh fall reflects a great deal of light up, so a scheme balanced in October can be uncomfortably bright in January, which is another argument for putting the outdoor circuit on a dimmer.
How Many Fixtures, and Where to Stop
Restraint is the whole skill outdoors.
Most schemes are over-lit rather than under-lit. The eye adapts to the brightest thing in view, so every fixture you add makes everything else look darker, and a facade lit evenly from end to end reads as a car park rather than a house.
| Subject | Sensible starting point |
| A single specimen tree | one or two, at different distances |
| A brick facade with architectural interest | grazing at intervals, not continuous coverage |
| A front entry | one aimed at the door area, plus the fixtures already flanking it |
| A path | low-level and frequent, aimed down, never up at faces |
Leave some of the property dark on purpose. Contrast is what makes the lit parts read, which is the same principle behind every aimed fixture indoors, and it is the reason two well-placed lights look considered while eight look like a security response.
Start with the single best subject on the property, light that one thing properly, and live with it for a week before adding anything.
Most people stop sooner than they expected to.
Work the Uplighting Out on Site Before You Buy
Walk the property after dark with a torch and use it as a stand-in for a fixture. Stand it in the bed, point it up, and move it until the effect is right. Mark where it was. That exercise answers distance, angle, and how many, which are the three questions that actually determine what you need.
Then check the boring things: where power is available, whether the run is line voltage or low voltage with a transformer, and whether the beds get dug over each spring. Bring photographs, rough distances, and a note of the wall materials.
Anything permanent outdoors that involves new circuits is licensed electrician territory in Ohio, and we would rather say so than sell you a fixture you cannot legally install yourself. Come and talk it through with us at Panic Lighting Co. on Silver Drive, and we will work out the fixture list from the effects you actually want.